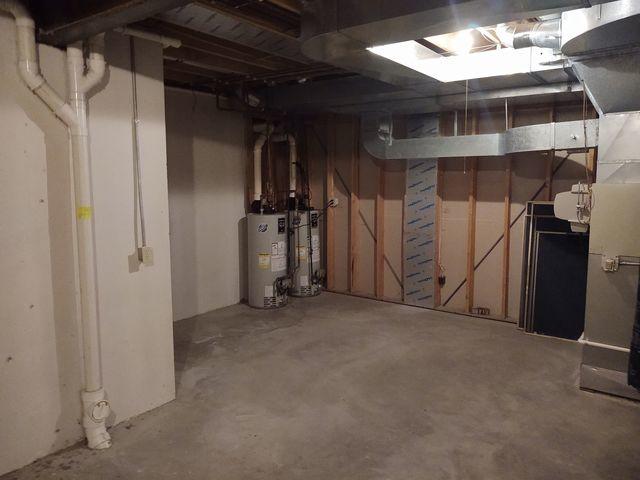
Before Waterproofing Installation
Here is a look into Daisy's basement before Ayers waterproofing system installation. She was concerned with the water leaking into her basement so it was crucial to have this area inspected and have a solution made for her.
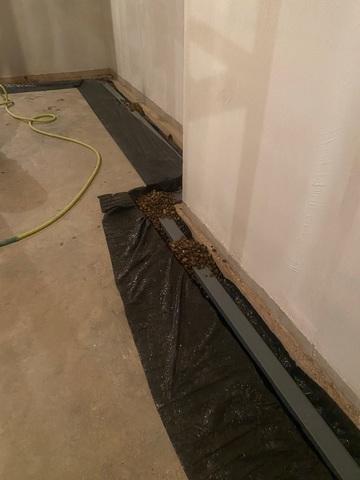
WaterGuard to the Rescue
Here we have the beginning of the installation of the WaterGuard System. Concrete is removed at the base of the walls, exposing the home's footing in order to begin the installation. It works as a drainage system, keeping water and dirt away from your home's foundation.
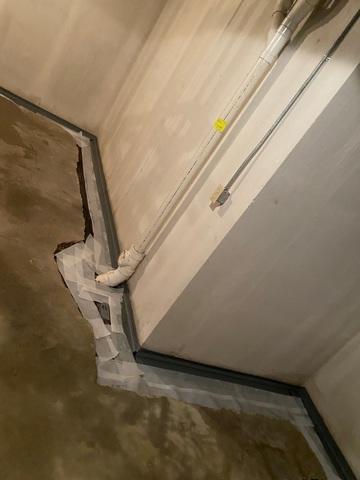
WaterGuard Process
Now you can see that the WaterGuard track is taped down in order to prepare for the concrete to be poured over top. The pouring of the concrete will finish the look and regular flooring can even be installed over this concrete if desired.
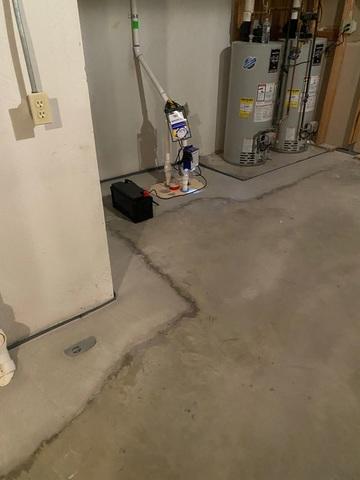
TripleSafe Sump Pump Eliminates Water Leaks
Next we have the installation of the TripleSafe Sump Pump. This system is very effective in preventing water leaks as it consists of three pumps with battery-operated backups that will hold up in emergency power outages. The WaterGuard will flow into this sump pump system, preventing these water leaks Daisy was having. You can also see that the concrete was poured over the WaterGuard, concealing the installation!
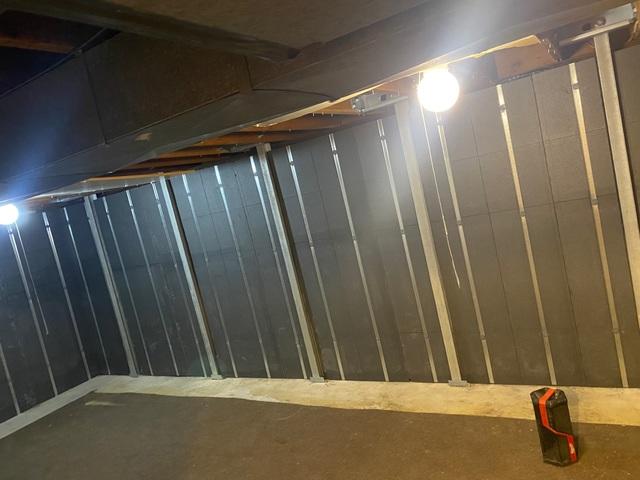
PowerBrace Stabilizes Basement Walls
Lastly, Daisy wanted her basement walls to have better stability. The PowerBrace installation you see here will ensure these important foundation walls are secure, preventing cracks. This system ensures the wall is securely tightened, straightened, and stabilized for a very long time. Daisy now has not only a trusty waterproofing system that keeps her belongings safe and dry, but she also has a system in place stabilizing her foundation walls!


